
4. Let the device change images automatically
Once you set up an "image set" and a "schedule", the device changes images by itself at regular times, so you don't have to do it by hand.
Step 1: Check the device's time
Schedules run on the device's clock, so make sure its time is correct first.
- In the menu on the left, tap Settings → Time Settings.
- Tap Sync Local Time to set the device's time from your phone. If the button is grayed out, turn off NTP automatic sync first.
- When you're done, leave this page (while this page stays open, the device can't go to sleep).
Step 2: Create an image set
An image set is "which images to rotate, and in what order".
- In the menu on the left, tap Image Sets → Create Set.
- Enter a name (for example "Lobby") → Save.
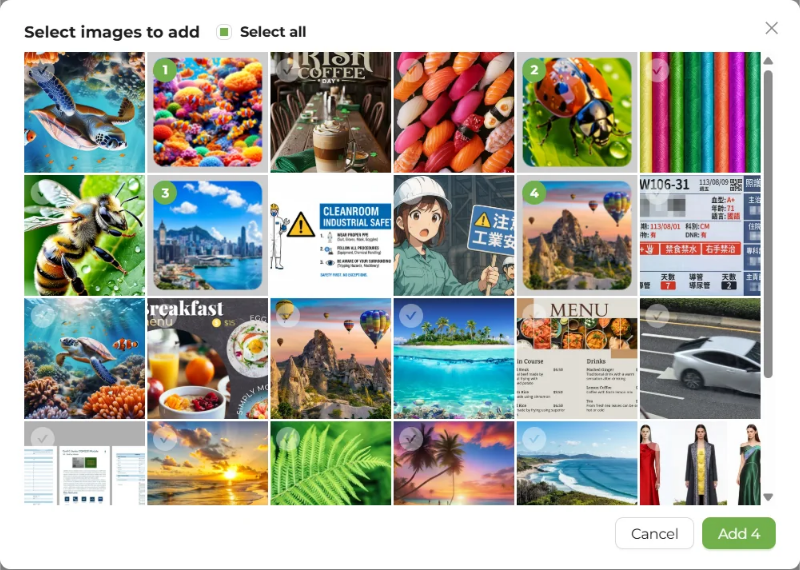
- The image picker opens automatically. Tap the images in the order you want them played → Add N.
- After checking the order, tap Done, back to list.
Step 3: Create a schedule
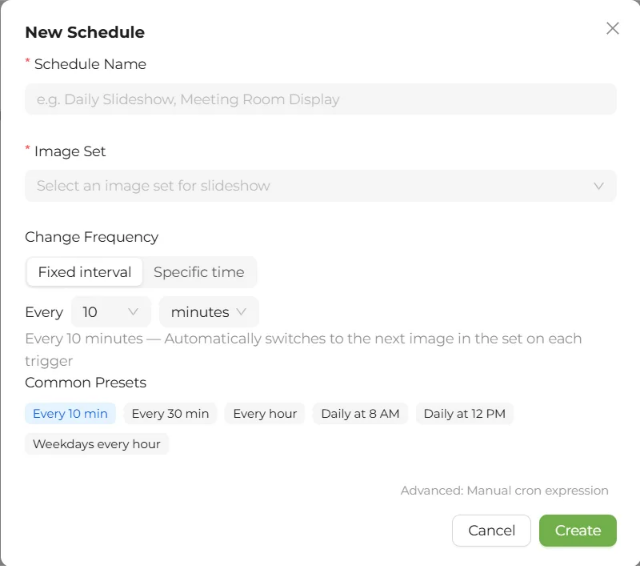
- In the menu on the left, tap Schedule → New Schedule.
- Enter a schedule name, then select the image set you just created.
- For the change frequency, just keep the default "Fixed interval: Every 10 min" for now.
- Tap Create.
The schedule starts changing images at the next time point (for example 9:10, 9:20…). The countdown on the card tells you how long until then.
Tips
- Put at least two images in the image set. With only one, it just refreshes the same image every time.
- To see a result right away, you can first display an image by hand as in the previous step.
- There's no need to change images very often; every 10 minutes or longer is generally recommended.
Next: 5. Save power and shut down
Learn more: Image sets, Schedules, Change frequency settings in detail, Time, time zone and time sync